


For a brand buying presentation boxes, the key question is whether the second layer makes the intended presentation easier. A beautifully lined upper tray can hide accessories neatly, but it also adds a handling step whenever someone needs them. Review that complete sequence before fixing the box height, tray construction and artwork.
Decide whether a lift-out tray suits the presentation
A lift-out tray is a separate assembly that the user raises out of the box. A fixed insert stays inside; a sliding drawer moves horizontally and usually remains supported by the surrounding structure. These formats require different space around the box and should be identified separately in the purchase brief.
Consider a hypothetical jewellery set: the upper tray holds the pieces presented first, while care documents and spare fittings sit below. That arrangement can support a deliberate reveal. If the lower compartment instead contains an item needed at every opening, repeatedly removing the upper level may be inconvenient.
Ask the person planning the presentation to describe the order of use. Include the available counter space and whether the recipient is expected to hold the box. A tray that needs two hands and a separate resting surface deserves a different brief from a small empty tray removed only during packing.
Review the tray in four states
Use the following worksheet with the actual proposed contents. It is a buyer’s review framework, not a standard test method. Assign agreed dimensions and acceptance criteria to the observations that matter for your project.
| State | What the buyer should check | What to record |
|---|---|---|
| Seated inside the box | Tray rests on its intended supports; lower contents remain clear; lid closes without pressing upper items | Support locations, usable heights and loaded configuration |
| Being lifted | Intended grip is reachable; tray clears the opening; contents remain controlled | Grip method, permitted load and removal direction |
| Resting outside | Tray sits stably on the intended surface and products can be accessed | Resting footprint, underside finish and display orientation |
| Being returned | Correct orientation is clear; tray seats without scraping, trapped tabs or contact below | Alignment features and repeat-use observations |
The value of this review is that each state exposes a different design decision. An attractive photograph of a seated tray does not show its underside, the space needed for fingers, or what happens when the user returns it slightly off-centre.
Reserve separate space for the upper and lower contents
Request a section drawing of the finished assembly. It should show the lower products, their lining or support, the tray underside, the finished tray floor and the closed lid underside. Measuring only the outside height leaves these relationships unresolved.
For a simple illustrative example, measure every elevation upward from the same finished internal box base:
- The highest point of the lower contents is 36 mm above that base.
- The underside of the seated tray is at 42 mm, leaving a nominal 6 mm gap above the lower contents.
- The finished upper tray floor is at 48 mm and the nearest lid underside is at 82 mm, leaving a nominal 34 mm above that floor.
These invented dimensions demonstrate the calculation; they are not recommended clearances. The 34 mm space is not automatically an allowable product height. The agreed no-contact allowance and dimensional variation still have to be accommodated. Include any raised lid lining, product protrusions or additional pads in the drawing.
Ask the supplier to identify what physically supports the tray. Do not let lower products become unintended supports simply because they happen to touch its underside. For perimeter fit and measurement limits, use the separate guidance on dimensional tolerance for wooden boxes rather than applying one gap to every construction.
Specify a grip that remains accessible when loaded
Finger notches, recessed edges and pull tabs create different ways to start removal. Assess them with products in place: a notch can be visible in an empty sample yet difficult to reach beside a tall item. Also check whether the open lid restricts the intended approach.
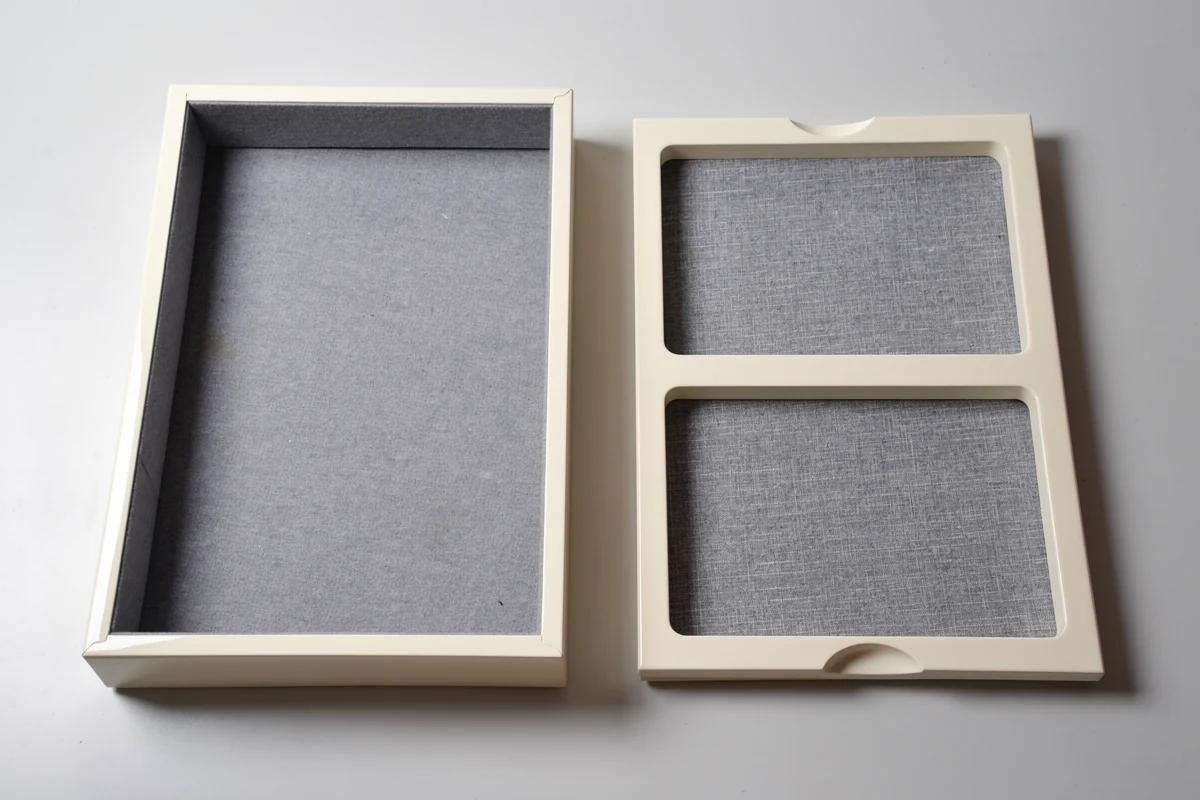
Write down whether the user lifts with one hand or two, and whether the tray must be emptied first. If ribbon tabs are proposed, ask what they are intended to do. A decorative pull or lifting assist should not silently become the approved handle for carrying a loaded tray.
Request a demonstration of the intended motion from first grip to a supported resting position. Watch for fingers pressing against the contents, edges catching on lining, or a need to tilt the tray sharply to clear the box. Change the access feature or opening geometry if the intended sequence cannot be performed reliably with the sample.
Separate removability from loaded handling
A removable part is not automatically a carrying tray. Define the permitted contents and their arrangement, and ask the supplier to assess the tray base, joints and lifting features for that use. Soft fabric over the base does not establish structural capacity.
The Canadian Conservation Institute’s guidance on handling heritage objects explains that support strength must suit the object’s weight and discusses rigid supports and trays for handling. This is museum guidance, not a load-rating standard for commercial wooden boxes; it cannot establish a payload for a proposed XRX tray.
In your own sample review, use the intended contents and include any permitted uneven arrangement. A tray filled symmetrically may be handled differently after some items have been removed. Agree with the supplier how that situation will be assessed, including the permitted lifting points and what constitutes unacceptable movement or damage.
If the intended use is only empty removal for cleaning or packing, say so. Do not pay for an undefined carrying function, and do not show a loaded carrying action in customer instructions unless that use has been approved.
Design the tray for the surface outside the box
The tray’s underside becomes relevant as soon as it leaves the box. Decide whether it will rest on a retail counter, a desk or a dedicated presentation mat. Review stability, exposed edges, visible fixing details and the surfaces that contact the counter.
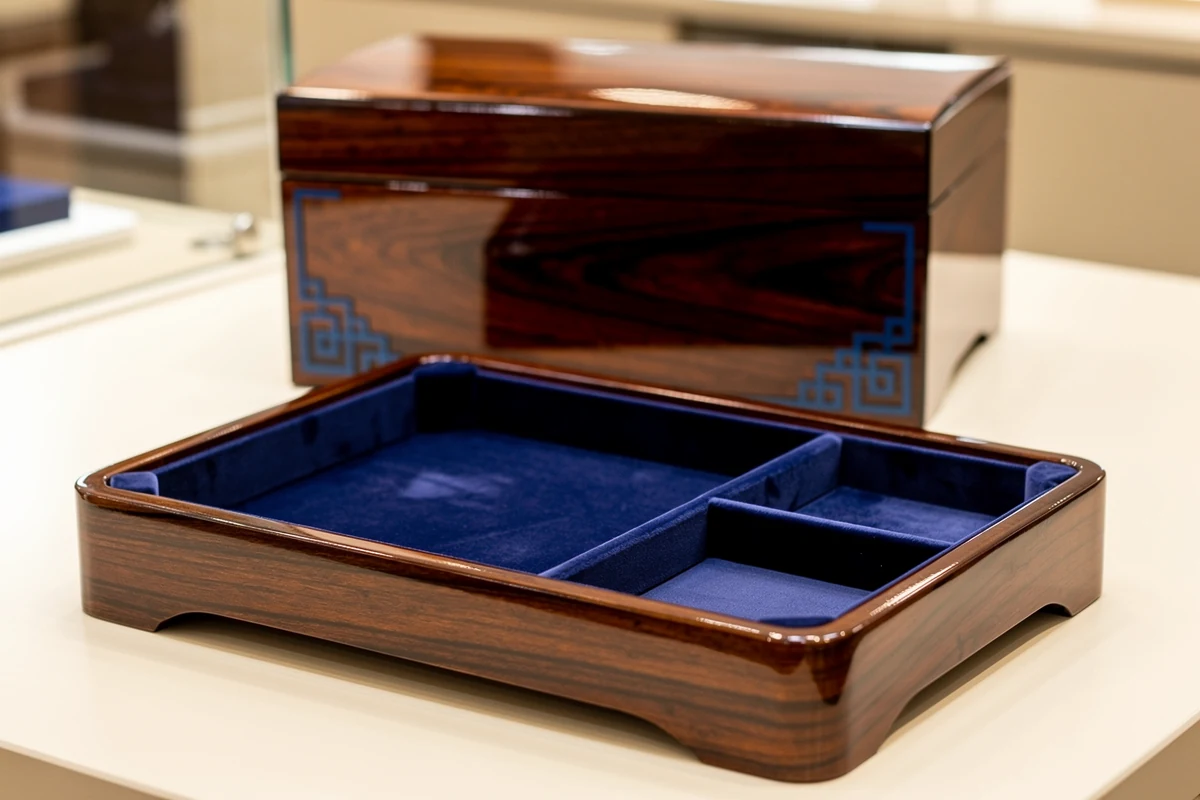
For a premium presentation, the tray can have its own visual role: a clearcoated wood-grain rim against coloured lining, or an opaque lacquered edge coordinated with printed artwork on the lid. Specify the visible finish on all sides instead of treating the tray as a hidden packing component.
Choose the contact lining for the actual product, then assess the finished assembly. Our guide to jewellery box lining materials covers that material decision separately. Here, the additional question is whether the lining remains tidy at exposed tray edges and whether loose folds or tabs interfere when the tray returns.
Make reinsertion and replacement explicit
A tray may look symmetrical while its grip features, compartments or supports have a preferred orientation. Decide whether users should be able to return it either way around. If there is one correct direction, make that direction understandable through the layout or an agreed discreet mark.
Check reinsertion with the lower compartment filled as intended. Confirm that nothing must be pushed down to make the tray sit correctly, and that tabs cannot become trapped between the tray and the box wall.
If spare trays or alternative layouts are part of the order, state that requirement before sampling. Matching nominal length and width alone does not prove interchangeability. Retain the approved interface dimensions, support locations, finished height and revision references, then check the requested tray variants with the relevant boxes. Otherwise, treat the approved tray and box as a specific matched configuration.
Send a brief that describes the complete tray system
For custom wooden packaging boxes, prepare a short tray specification alongside the outer-box design. Include the contents assigned to each level, their dimensions and weights, the intended opening sequence, and the available space for setting the tray down.
Add the proposed grip, whether loaded removal is required, the visible finishes, and any replacement-tray requirement. Ask for a drawing showing both levels and a sample review covering all four states. Keep the agreed observations with the approved revision so later changes to lining, products or tray height can be assessed against the same brief.
To discuss a project with XRX, send your wooden box requirements with product dimensions, quantities and a simple sketch of the two levels. Highlight which items must remain in the tray during removal; that decision helps define the structure before the decorative details are finalised.
Frequently asked questions
What should buyers specify for removable trays for custom wooden boxes?
Specify the contents of each level, finished usable heights, tray supports, lifting method, and where the removed tray will rest. State whether loaded removal is required and review the sample while seated, lifting, resting outside and being returned.
Can a removable wooden box tray be carried with products inside?
Only when that use has been assessed and approved for the particular tray, contents and lifting method. Removability alone does not establish carrying capacity. The brief should identify the permitted load, arrangement and lifting points.
How much clearance should there be below a removable tray?
Set the clearance from the actual lower contents, tray underside and agreed dimensional allowances. There is no single gap suitable for every custom design. Use a section drawing of the finished assembly and confirm that the lower products do not unintentionally support the tray.
Is a ribbon pull enough for lifting a loaded tray?
A ribbon pull may be intended only to start removal or assist with an empty tray. Its presence does not prove that the attachment or tray construction can carry the contents. Confirm its intended function and approve the actual loaded handling method if required.
Can replacement trays fit boxes from a later order?
They can be specified for that purpose, but fit should be confirmed against controlled interface dimensions and the relevant box revisions. Check support positions, finished height, orientation and lining as well as length and width; matching nominal dimensions alone is insufficient.